Artwork Approver Docuementation
Welcome to Artwork Approver Documentation. In this documentation you will find easy to follow guides on how to control and customize every feature that Artwork Approver has to offer! If you need additional help please submit a ticket or e-mail us at support@artworkapprover.com
- Customers
- Tasks
- Task Status Settings
- Adding a New Design
- Automated Approvals
- Print Locations
- Design Types
- Colors
- Users
- Profile Management
-
Customers
Customers are the base of each design. Each design is tied to a specific customer. A design may only be tied to one customer. To create a design, you must first create a customer. To create a customer, use the left-hand navigation menu and select CUSTOMERS.
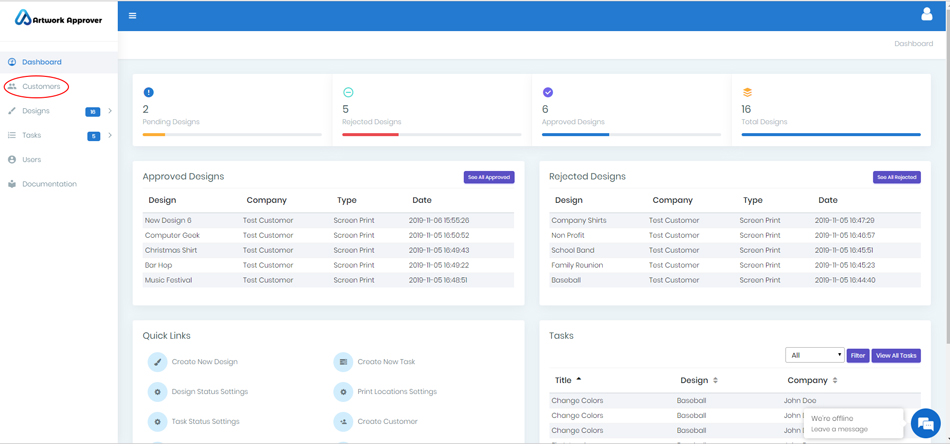
Once in the customers, click on the large purple button on the top on the right side that says CREATE CUSTOMER.

Once in the create customers screen, fill out the relevant information about the customer in the provided fields. The required fields are Company Name, Contact Name, Phone, and E-mail.
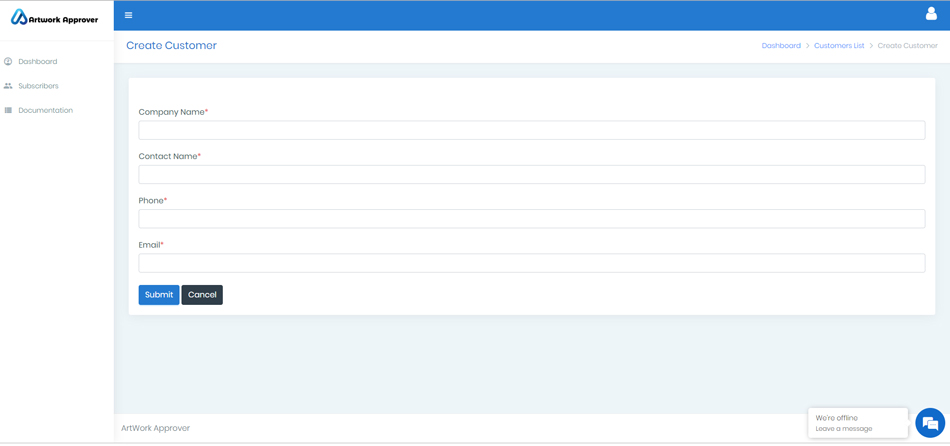
After the information is entered, click the submit button. If the customer is added successfully, a green notification area will appear at the top of the customer screen indicating that the customer was added.
-
Tasks
Artwork Approver includes a simple task list manager. The task list is used to create and manage tasks related to customer's artwork. Tasks can be created for yourself or any other user that is part of your account. To create a task click use the left-hand navigation menu and click on TASKS > TASK LIST. This will open the main task list screen. To create a new task click on the large purple button on the top right-hand side that says CREATE TASK. This will open the new task creation form. Fill out the relevant information about the task. Title, Description, Assign To, and Task Status are the required fields. You may also relate the task to a specific client and/or design. Once the information is filled out, click the SUBMIT button. If the task was successfully added, a green notification bar will show at the top of the screen saying TASK CREATED SUCCESSFULLY!
To view all of your open tasks, either click on the right-hand side navigation menu TASKS > TASKS LIST or it can be viewed on your home dashboard on the bottom right-hand side. The dashboard view will show the latest five tasks that were created. You can view all tasks from the dashboard by clicking on the small purple button in the tasks section of the dashboard that says VIEW ALL TASKS. To only view tasks of a certain status, use the FILTER drop-down menu on the tasks widget on the home dashboard.
-
Task Status Settings
Artwork Approver is very flexible, as shown with the task status settings. You may add, change, or delete statuses to customize your task workflow. To create, add, or delete a task status, use the left-hand navigation menu and click on TASK STATUS SETTINGS. This will open up the task settings screen. Click on the large purple button on the top right-hand side that says CREATE TASK STATUS. The task status screen will open. Add the name of the status that you want to add to your tasks workflow and click submit. If the status is successfully entered, a green notification bar will show at the top of the screen with the message TASK STATUS ENTERED SUCCESSFULLY.
-
Adding a New Design
Adding a design to Artwork Approver is easy. Use the left-hand side navigation menu and click on DESIGNS >DESIGN LIST. Once on the Design List screen, click the top right-hand side button that says CREATE DESIGN. Click CREATE DESIGN which will open the new design entry screen. Enter the following information:
TITLE: The name of the design
REFERENCE NUMBER: This can be used to tie the design to an MRP or another outside system.
DESIGN TYPE: This is a drop-down menu that allows you to select from pre-determined design types. You can configure design types in the DESIGN TYPES section.
DESIGN SIZE: This is where you enter the size of the design that will be printed.
COMPANY: This is a drop-down menu that allows you to select the customer that the design is related to. This field is populated by the customers you have previously entered.
NUMBER OF COLORS: This is where you enter the number of colors in your design.
COLORS: This is a multi-select lookup field that allows you to select from previously entered colors. You can configure colors in the COLORS section.
PRINT LOCATIONS: This is a multi-select lookup field that allows you to select from previously entered print locations. You can configure print locations in the PRINT LOCATIONS section.
THREAD COUNT: This is where you enter the thread count, if applicable to your design.
SCREEN MESH NOTES: This is where you enter the screen mesh used, if applicable to your design.
DESIGN NOTES: This is where you enter any notes related to your design.
DESIGN STATUS: This is a drop-down lookup field to select the status. New designs should be set to PENDING to trigger the automated e-mail approval feature for that design. If you require additional design statuses, you can configure them in DESIGN STATUS.
PROOF IMAGE: This is a "drop zone" for your design proof. Upload a JPG, PNG, TIFF, or SVG into this section. This is the file that will be sent to the client for approval.
FILES: This is a "drop zone" for your print files. Once a design is approved, upload your print files in this section for retrieval during the print process or in the future. Acceptable files are JPG, PNG, EPS, PSD, AI, SVG, PDF, EMB, DST, or any other file type EXCEPT for an EXE.
After the above information is entered, click the submit button. If the design is added successfully, a green notification will appear at the top of the screen with the message DESIGN ENTERED SUCCESSFULLY.
-
Automated Approvals
Sending a design for approval is simple. After creating a design, go to the main DESIGN LIST screen. On the left-hand side buttons in the row of the table that contains your design, a new button should have appeared. The button is a small "send" icon and is yellow. Click the send icon next to the design that you want to send for approval. This will prompt a pop-up notification that asks for confirmation that you want to send the design for approval. Click YES, SEND APPROVAL REQUEST. This will initiate an approval e-mail to the customer's e-mail address that was entered when creating the customer.
E-mail approvals generate a link to a web page that displays your design, along with pertinent information about the design to the client. The client can approve the design or request changes from this page. If the client approves the design, you will receive an e-mail notifying you that the client has approved with a link to view the design. If the client requests changes, you will receive an e-mail notification informing you that the client has rejected the design with a link to the design. To view the changes that have been requested, go to the designs list page. You can either click on the design name and view the changes requested at the bottom of the screen OR in the small row of buttons to the right-hand of the design name, there is a purple "eye" button. Click the purple "eye" button and the customer change request will be displayed.
-
Print Locations
Add print locations to the database by using the left-hand side navigation menu and clicking on DESIGNS > PRINT LOCATIONS. Once clicked the print locations screen will open. Click the large purple button on the top right-hand side that says CREATE PRINT LOCATION. The print location screen will open. Add in the name of the print location you want to add to the database and click SUBMIT. If the print location was added successfully a green notification bar will appear at the top of the screen that says PRINT LOCATION ENTERED SUCCESSFULLY. The print location can now be added to a design in the create a design section.
-
Design Types
Add design types to the database by using the left-hand side navigation menu and clicking on DESIGNS > DESIGN TYPES. Once clicked the print locations screen will open. Click the large purple button on the top right-hand side that says CREATE DESIGN TYPE. The design type screen will open. Add in the name of the print location you want to add to the database and click SUBMIT. If the print location was added successfully a green notification bar will appear at the top of the screen that says DESIGN TYPE ENTERED SUCCESSFULLY. The design type can now be added to a design in the create a design section.
-
Colors
Add colors to the database by using the left-hand side navigation menu and clicking on DESIGNS > COLORS. Once clicked the print locations screen will open. Click the large purple button on the top right-hand side that says CREATE COLOR. The color screen will open. Add in the name of the color and the manufacturer you want to add to the database and click SUBMIT. If the print location was added successfully a green notification bar will appear at the top of the screen that says COLOR ENTERED SUCCESSFULLY. The color can now be added to a design in the create a design section.
-
Users
Depending on which subscription plan you are signed up for you can add users to an account. To add a user use the right-hand side navigation menu and click on USERS. The user screen will be displayed. On the top right-hand side click the large purple button that says ADD USER. The add a user screen will be displayed. Enter the user's name, email, and password and click the SUBMIT button. If the user was added successfully, a green notification bar will appear at the top of the screen that says USER ENTERED SUCCESSFULLY. The user can now log in with the credentials that were created when the user was created.
If you do not have enough user slots available on your subscription plan, the system will notify you and you can click the link that says UPGRADE. You will have to upgrade to a higher level plan to add users if you have maxed out your allotted user slots.
-
Profile Management
You can manage your profile, view subscription status, invoices and reset your password in the profile section. To get to the profile section, click on the profile icon on the top right-hand side of the top bar and then click MY PROFILE. There are four tabs in the profile section.
PROFILE: This displays your name, e-mail that is on file, and the number of tasks that are assigned to you.
SUBSCRIPTION PLAN: This displays the plan that you are subscribed to, the date of your original subscription, previous invoices, and the monthly fee that you your plan costs.
SETTINGS: Here you can change the name associated with your profile.
PASSWORD: Here you can change your password.